|
The Data Manager is a powerful database creator and online form builder with a ton of great features. Use the Data Manager to create and manage database sets of any kind like important contact databases, phone call records, contractor and employer databases, staff lists, or anything else you can think of. Use the Data Manager to setup powerful online forms for collecting information like membership forms, event RSVP forms, survey forms, signature forms, or any other type of form. View, edit, export, and download record PDF's in a central area with advanced searching and sorting capabilities. Advanced features include allowing users to manage their own submission records, linking database sets with each other, and so much more!
Data Groups A Data Group is a specific online form or set of data that you want to collect and track. Each data group will have its own information fields, online form, categories, and management section. Click the Data Groups button to add new groups or archive existing groups. Add a New Data Group To add in a new group go to the Data Groups page and enter the title of the group or form. If you want to use the data group as an online form leave the Admin Only option to No. Or if this is a private database that only admins will add and manage records for set the Admin Only option to Yes. You can always change the settings for the form once its created. The template drop down menu provides a number of pre-set form templates to start with. If you want to start with a blank form and add your own field, leave the template option to none. Or select the type of form template you want to start with from the drop down menu. Once the form is created, you can modify the fields with your own settings or add/remove fields easily. Click the links below to view each built-in form template. Expense Report Form With Calculations Reimbursement Form (3 line item columns) Reimbursement Form (5 line item columns) Contact or Contractor Database Or start with an empty form and add fields yourself with a simple form. Click the Save button to create the form. Once completed, you will see the form listed in the data groups. Click the Settings button next to the new group to setup the initial configuration for the data group. Data Group Settings The settings page controls all of the properties of the data group. For example you can set the online form and the viewing page to require a login. The settings page also provides the form page link and the view page link. You can set an email address for notifications when the online form is submitted and control when the online form is available. You can also set the content of the email notification, the header text for the form, and the thank you message that appears after the form is submitted by a user. The settings for the view page allow it require a login or be public. You can also allow users to view their own submissions. If a user is logged into the website when they submit a data groups online form the record will be tied to that user. Set the logged in users can view their submissions option to Yes to allow users to view their past submissions. Set the edit option to Yes to allow users to edit their own submission records after they have been saved. After updating the form settings go back to the Data Manager page. The new group will be listed at the top. Click the data group button or select it from the menu. If there are more than 10 active data groups a drop down menu will appear to save space. Clicking or selecting the data group button will make it the active group you are viewing and managing. Archiving Data Groups Archiving a data group will hide the group from the main data manager screen. To view archived data groups click the View Archived Data Groups button at the bottom of the data groups list. To re-activate an archived data group edit the group settings from the archived list and set the archived option to No. Then save the settings.
Admin Add New Record - This icon opens the admin version of the online form. Fill out the form to add a new record to the database. Send Broadcast Email - This icon opens the email broadcast form. The email broadcast will be sent to the search results showing when the icon is clicked. To activate the email broadcast button the data group must have a form field with the "Format As" option set to email. On the broadcast form you can select the email field to send to. View Select Field Statistics - This icon opens the statistics window. The data group must have a select menu for this icon to appear. The graphs will show statistics for selections in the select menus. Export Records - This icon opens the export window. You can export all records or only specific search results. Import Records - This icon opens the import window. Use a spreadsheet from the export area to import or update records. Manage Database/Form Fields - This icon opens the form builder where you can edit existing database form fields or add new fields. Data Group Settings - This icon opens the data group settings form. Control settings like notification email, form thank you message, and email notification message.
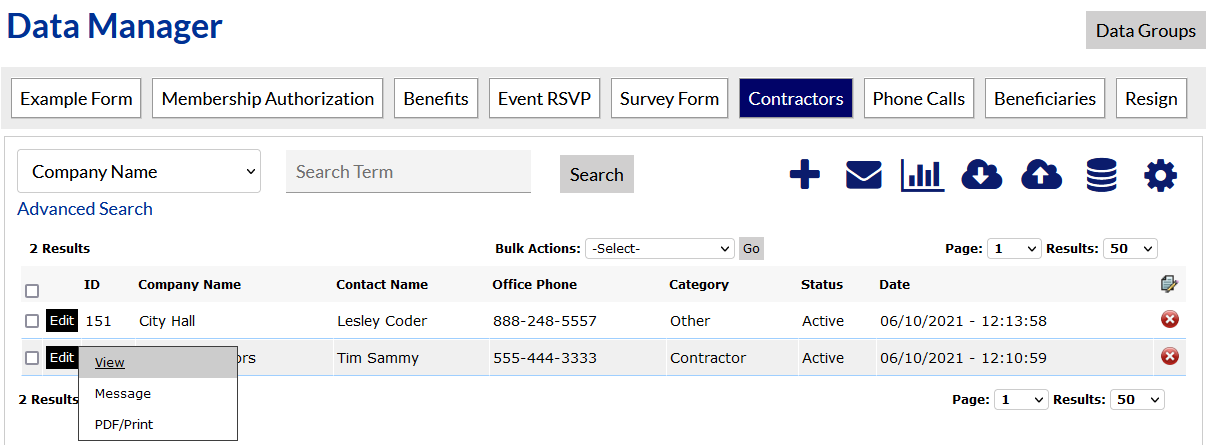
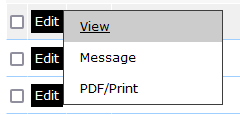
In the list of records for a data group hover over the Edit button and a few more options will appear. Click the Edit button to edit the record or view past update history. Click the View hover menu to view the record quickly. Click the Print/PDF hover menu to download a PDF of the record. The PDF will be formatted like the form. If the data group contains an email formatted field the Message hover menu will also appear. Use the Message menu to send an email directly to an individual record email address.
Each time a saved record is updated a copy of the previous version is saved. So there is always a running update history showing what was changed and which editor or user made the change. To view the record update history click the edit button next to a record. Then at the bottom of the edit form click the View Update History link to open the historical files.
The list of records will show the most recent records listed first by default. To search for specific records use the search bar. The drop down menu has fields listed that have the Search option enabled for that field. To add or remove a field from the search drop down edit the field in the form builder and set the Search option to yes or no accordingly. Select menus will not show in the drop down. Select menus will show in the Advanced Search box. If a data group has a select menu click the Advanced Search link to open the advanced search options. Each select menu enabled for search will be listed. You can select specific values from the select menu to search for records with those same selections. Enter any search terms you want to narrow the search with. For example to search for all last name fields with last name Smith select Last Name from the drop down menu then type Smith into the search term box. Then click the Search button to see the results. To sort records by a specific field click the field title in the record list. That will re-sort the current search results based on that field. Click the field title a second time to sort the results in the opposite direction. The page number drop down menu will let you jump to a specific page of results. The results drop down menu will let you show more than the default 50 records per page. For example select 1000 in the results drop down to show 1000 records per page. Use the bulk actions drop down menu to delete multiple records at once. Click the check box next to each record you want to delete. Then select delete from the bulk actions drop down menu. Click the Go button to start the process. To delete a single record click the red x icon on the right side of the record.
You can customize the columns that are displayed in the record list. Click the edit icon that appears on the right side of the column title row.
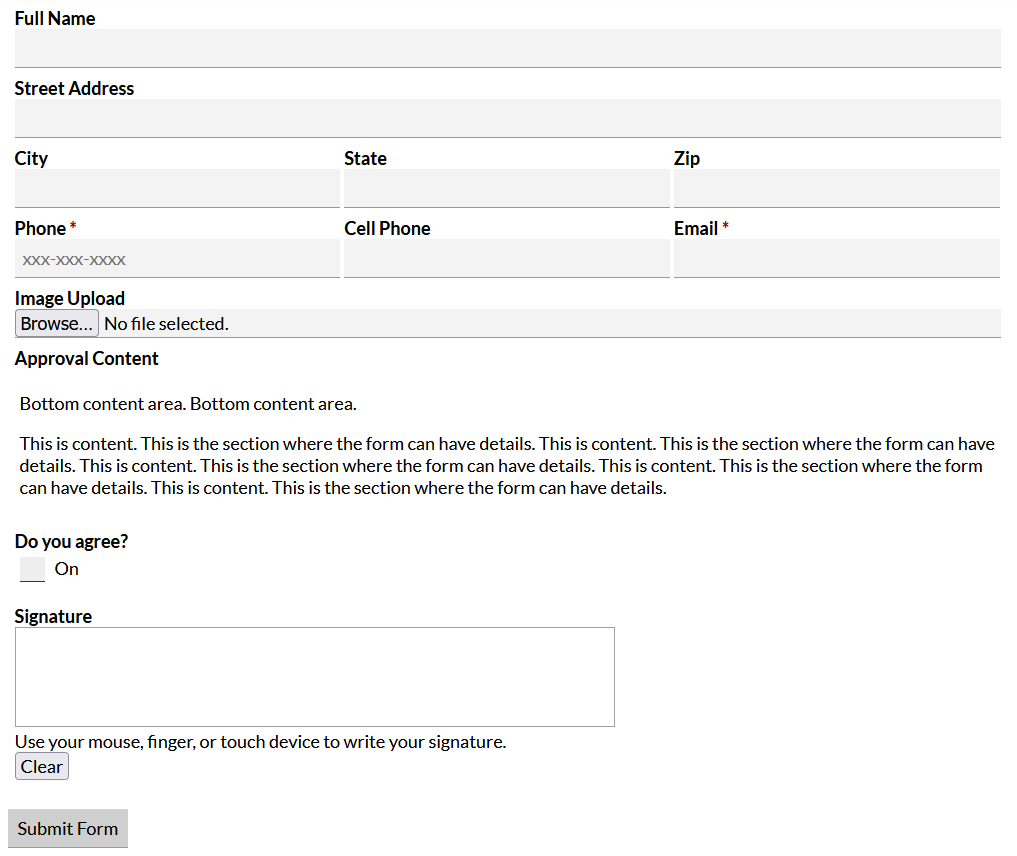
The online form page allows non-admins to submit the form. When the online form is submitted a record is saved in the database and an option notification can be sent to the data group notification email and to the form user. If the form has an email formatted field the notification email will be sent to that email also. Open the settings for a data group by clicking the settings icon when viewing a group. The Form Page Settings section shows the URL for the form page that users would access. It also has a link to View the page. The Admin Access only option must be set to No or the Online Form Page will not be inactive and only admins will be able to add records using the admin new record form. To require a login for the online form set the form page requires login option to Yes. Only logged in users will be able to access the form.
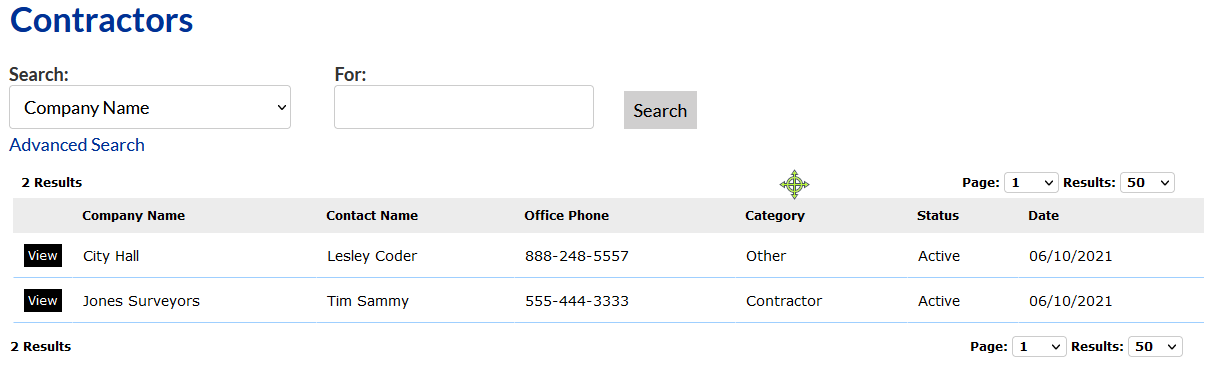
The view page allows non-admins to view and search the records. You can use the view page as a link in the website to display the data. It can require a login or be public. Open the settings for a data group by clicking the settings icon when viewing a group. The View Page Settings section shows the URL for the view page that users would access. It also has a link to View the non-admin viewing page. The enable view/search page option must be set to yes or the view page will not be active. You can also control if the view page requires a login and if logged in users can view their own submissions. If a user is logged into the website when they submit a form they will be associated with that record and you can allow them to view or update their records.
To edit the database/form fields click the Database icon when viewing a data group.
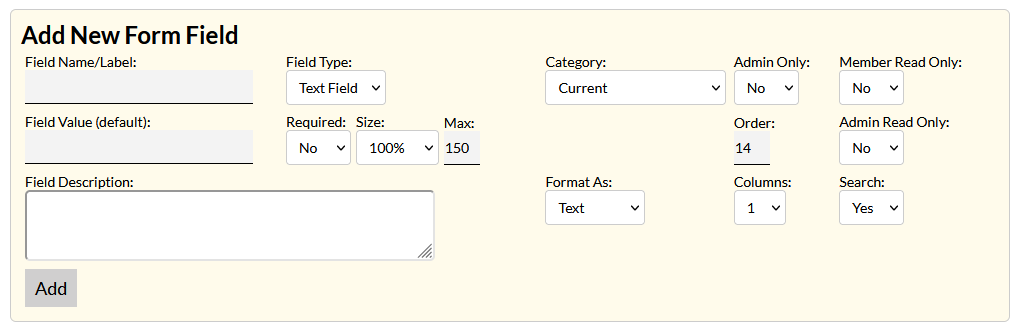
Add New Form Fields From the drop down menu on the database window click the Add Current Fields option or scroll to the bottom of the window to add new fields. Use the Add New Field form:
Field Name/label: This is the name and label that users will see for this form field. Make it descriptive but keep it short and simple. Field Type: Select what type of field this will be. Options are: Category: Current are active fields. Admin Only: Only admins can see this field. The field is hidden from other users. Member Read Only: Non-admins can only read this field but cannot edit or make changes to the field. Field Value(default): This is the default value displayed for the field on the online form or new record page. Required: Set to Yes to require this field to be completed Size: Control how wide the field will display. Default is 100% which will fill the space the field is in. Max: Limit the total number of characters that can be entered into this field. Order: Control what order this field is displayed in. Admin Read Only: Set to Yes to set this field as display only. Nobody can make changes to it. Field Description: Enter text that will appear below the field. This can be used to add descriptive text to a form field. Format As: Set the format of the content that must be entered into this field. Columns: This allows you to control how many columns to display the field in. For example if you want this field to be on its own line leave it set to 1. If you want this column and the next column to be listed side by side set the Columns option to 2. If you want to have 3 columns side by side set it to 3 and so on. All columns that you want to display side by side need to have the same number of columns selected. Search: Set this option to Yes to allow searching records based on this field. If the field type is text it will appear in the drop down menu. If the field type is select it will appear in the advanced search menu. Edit Existing Form Fields In the form builder window each existing field will be listed with arrow icons to move the field up or down the form, the pencil icon to edit the field settings, and the red x to remove the field. A preview of the field will also be show. Fields will be listed one by one not in the column order of the actual form.
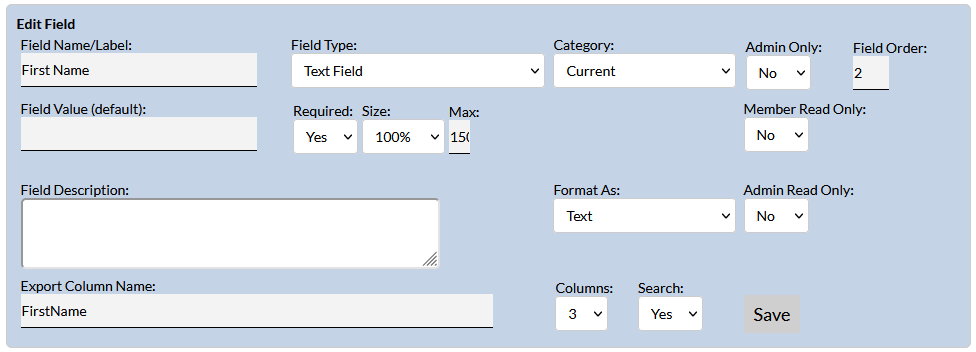
Click the pencil Edit icon to open the edit form for a field. That will reveal the settings for that specific field. The same fields from the add new field form are available. Make changes and click the Save button.
Any fields that are removed appear in the in-active field list. Select the View All Field option from the drop down menu to view in-active fields also. To re-activate a field edit the in-active field, then set the category to Current and click the Save button.
Calculate values based on user entry and allow Group field records
Page Last Updated: Sep 29, 2023 (11:23:00)
|
|
Data Manager |
|


.png)
